


The Broken Light Bulb Lamp
- An artistic way to reuse old incandescent light bulbs -

What do you get when you combine an old incandescent light bulb, some LEDs, and free time? Well here's one answer: an artistic, functional table lamp! Using a similar project on Instructables as inspiration, here is my first version of a "Broken light bulb lamp" design.
Purpose
The purpose behind the broken light bulb lamp is simple. Having replaced many or all of the incandescent lamps in my house, my parents' houses, etc. with Compact Fluorescent Lamps, I have accumulated a pretty large collection of used incandescent lamps. I could've thrown them all away, but that seemed like a terrible waste of resources. I could have tried to donate them somewhere, but there's very little interest in used lamps. So one solution I've come up with for "reusing" these old lamps is to use them as art. Before I continue I should mention 2 points below:
* The term "lamp" refers to the complete, working object most people incorrectly call a "light bulb". For incandescent lamps this includes the screw base, the glass light bulb, and the filament and gasses/vacuum inside the bulb; all of which are needed for the "lamp" to operate. Once I break the lamps, I start to refer to them as "light bulbs" because they are mainly being used for the glass light bulb, and not the other components which make up the lamp.
* I don't reuse the incandescent lamps for lighting because of their dismal luminous efficacy. Incandescent lamps are an ancient technology best used as heaters or perhaps art, and due to terrible efficacy (average 14 lumens per watt) are increasingly being regulated and/or banned for general use by governments around the world. My lighting of choice in order of rank would be Linear fluorescent lighting (average efficacy 80 lm/W), Compact Fluorescent lamps (average efficacy 55 lm/W), Metal Halide lighting (average efficacy 90 lm/W), and for low-power applications Light Emitting Diodes (LEDs). End digression =]
Materials List:
- (1) Incandescent lamp (preferably an old/bad one!)
- (1) "keyless" or switched porcelain lamp holder
- (5) T1-3/4 (5mm diameter) Light Emitting Diodes
- (1) 330-ohm, 1/4-Watt resistor
- (1) 18-Volt, 30mA or larger DC power supply (i.e. a "wall-wart")
- Some short lengths of small-diameter wire (i.e. 24 or 28 AWG)
- A lighter, gas cooktop, or other controllable flame source
- A soldering iron, solder, hot-glue or strong tape
- A screwdriver, hammer, eye-protection, etc...
- Some patience...
Lamp Selection
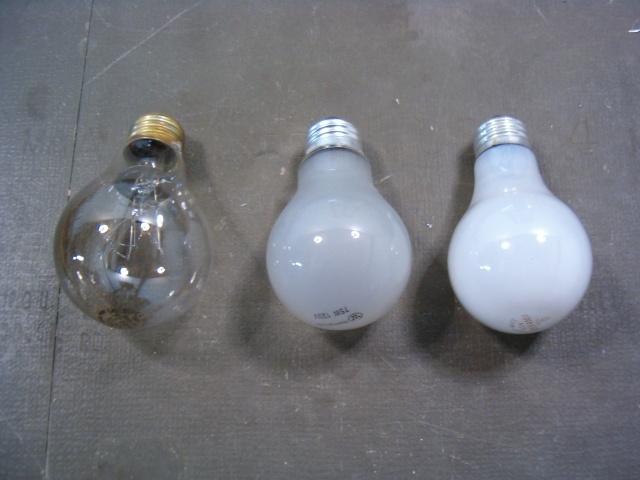
Not all incandescent lamps will produce the same results for the purpose of this project. For example, lamps that appear "bright white" (when off) are usually made of clear glass with a layer of white phosphor on the inside. As soon as you break the glass, the phosphor will wash/blow away, leaving you with a perfectly clear bulb.
In my opinion the best lamps for this project are the kind which are made of "frosted" glass. When turned off, they will be slightly translucent and appear a dull, foggy gray color (as opposed to the opaque, bright white look of the lamps mentioned in the previous paragraph). Such "frosted" lamps provide an excellent look for the broken light bulb lamp, and are highly recommended. Typically "long life" and/or "130 volt" lamps have bulbs made of this type of glass.

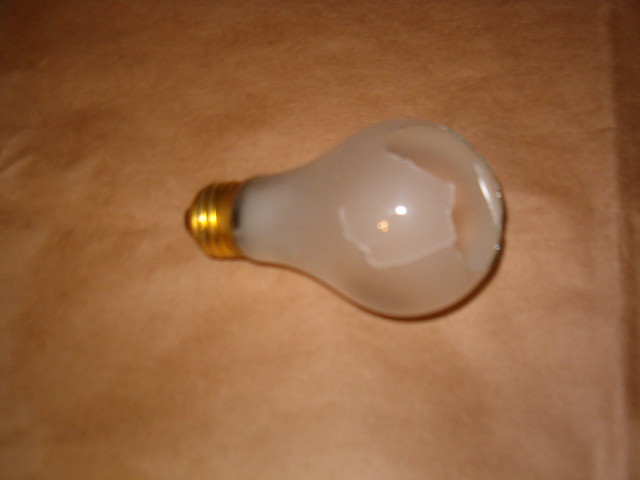
Three common types of glass bulbs used for incandescent lamps. From
left to right: clear glass, frosted glass, clear glass with internal phosphor coating.
Step 1: Break the glass bulb
Breaking the glass bulb of the lamp is tricky. Not only can you hurt yourself (and NOT hold me responsible), but it takes some practice to break the bulb in an artistic pattern, without all of the glass shattering or cracking off the base. This is due to the fact that the glass is thin, and relies on the complete spherical shape of the bulb for strength.
It is possible to use a rotary power tool with a glass/tile bit to start a hole in the top of the bulb. However, I found that a decent alternative is to strike the very top of the bulb with a pointed object, such as a large nail or the tip of a phillips or Torx screwdriver. To do this, it is easiest to screw the lamp into a light socket which is relatively fixed, mounted to a piece of wood, strapped to the floor, or put the lamp in a vice (just keep it stationary!).
Next, for your safety, cover the lamp in a plastic bag or similar and put on your safety glasses! Place the nail, screwdriver, etc on the top of the bulb, and strike the other end very briefly, but forcefully with a hammer. It will probably take you several strikes to actually break the bulb (if you strike too softly) or several bulbs to have any glass left (if you strike too hard). When you do break the bulb there should be broken and/or cracked glass around the top, but the lower portion of the bulb should be intact and most importantly, crack-free.


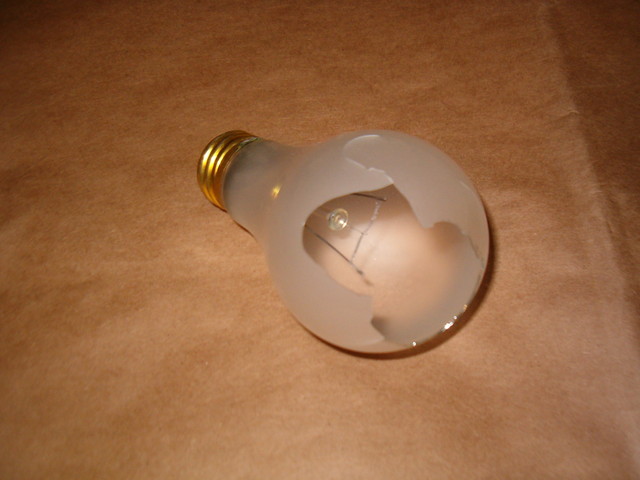
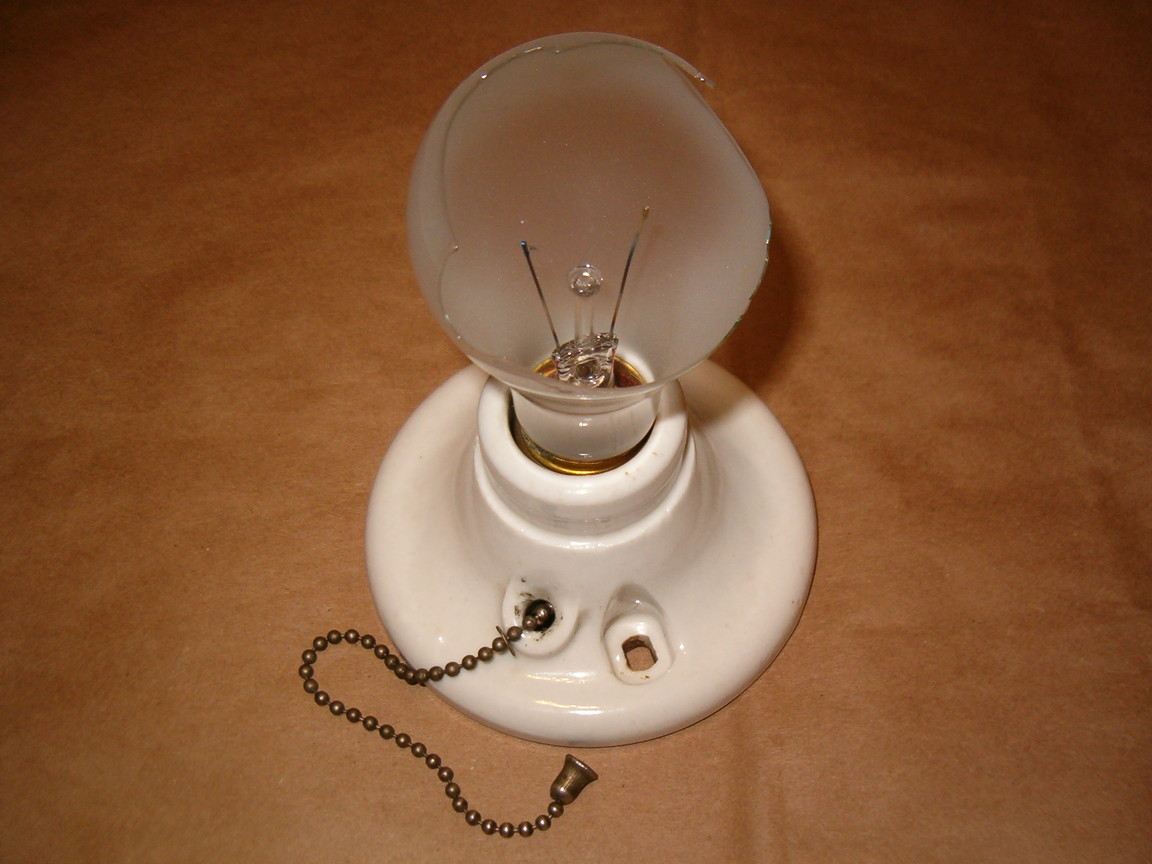
Light bulb after being struck with a nail and hammer
to crack/break the top portion of the bulb.
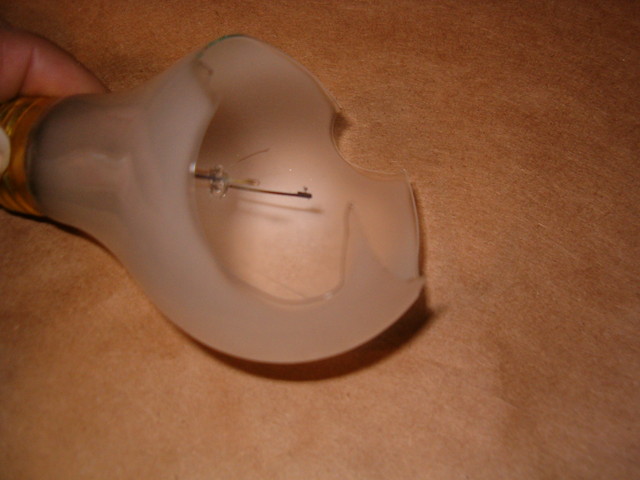
Step 2: Re-shaping the bulb
If your light bulb still has cracks in the glass (like mine did) you need to continue breaking the glass until no cracks remain. Again, this is a tricky process that will take some practice. Using your fingers (very carefully!) or small pliers, gently pull at the edges of the broken glass bulb to pull / break off more pieces of glass.
The goal here is that there should be NO cracks remaining anywhere in the glass, only clean cut lines where the glass broke off. If cracks remain, and you've already removed too much glass, you'll probably want to try again with a new lamp. Cracks in the glass will only continue to grow and present a safety hazard during the next step. Also, now is a good time to rinse the bulb out with cold water to get any soot or glass shards out.

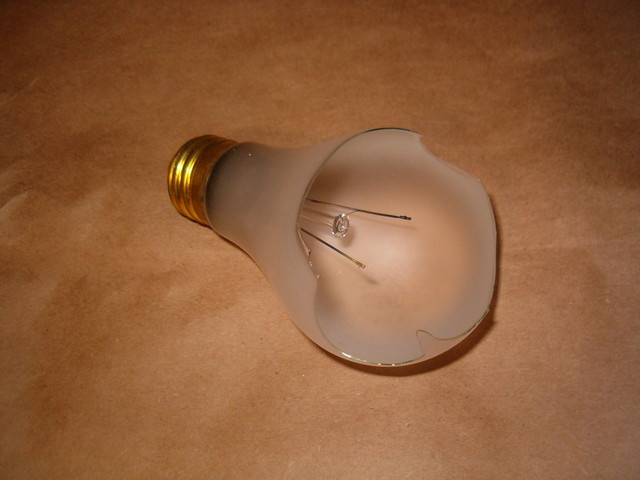
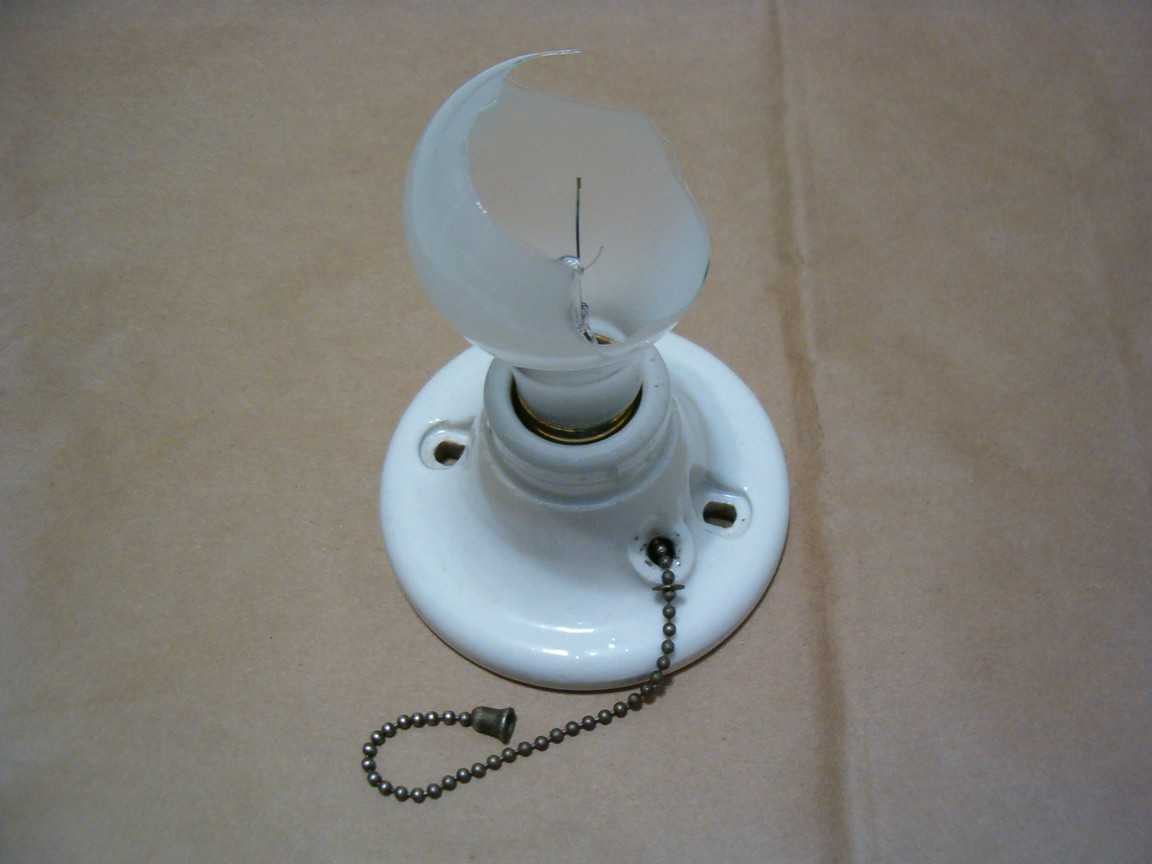
Light bulb after removing all the remaining
loose and cracked pieces of glass.
Step 3: Reflowing the glass
In order to make the light bulb stronger and safer to handle, we need to heat the edges of the broken bulb. Heating the glass to the right temperature will cause the glass to "reflow", which makes it both smoother and resistant to further chipping or cracking.
The glass bulb can be heated with a cigarette or kitchen lighter, but I found that one of the best things to use is a natural gas cooktop set to a medium temperature. On my cooktop, once I removed the burner grille I was able to put the edges of the light bulb into the flame. Using channel-lock pliers, I held the bulb by the base and placed the broken region of the bulb over the burner (but not in the flame) to let the glass slowly heat up.
Once the glass had a chance to heat up, I put one of the broken edges in the flame. As frosted glass heats up to "reflowing" temperature, it will become clear. As the edge of the glass bulb became clear, I would slowly rotate the edges of the bulb through the flame until all of the broken edges had turned clear. In most cases, you will be able to see the sharp edges of the glass glow red hot as they reflow into smooth clear edges of glass. NOTE: Be sure to keep the flame and intense heat on the broken *edges* of the glass bulb and off of the remainder of the bulb as much as possible, or the rest of the bulb could break or develop cracks... which is bad!


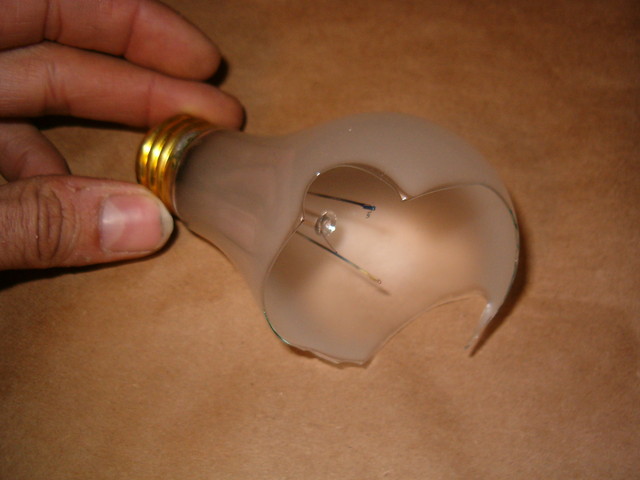
Light bulb after using a gas stove cooktop
to heat and re-flow the broken edges of the bulb.
After reflowing the glass you should have a bulb with smooth edges that will be resistant to cracking or breaking. This means you can show it to your friends without fear of getting sued (unless you have excessively-clumsy friends, in which case don't let them near it!).
Step 4: Wiring the LEDs
Here's the part where you get to play with LEDs! There is a lot of flexibility with regards to LED selection. The color and quantity of LEDs chosen will alter the requirements of the power supply (mainly the output voltage.) I found that for a standard "A" shaped light bulb, five (5) "super-bright", 5mm sized LEDs created a very nice look, and fit nicely in the light bulb.
I chose to use typical "cool" white LEDs, which have a forward voltage drop of about 3 Volts each. I wired them in series with a 330-ohm resistor to allow them to run at full power (approximately 15mA) from a 18-volt DC power supply. The LEDs are wired in series rather than parallel because running them in series wastes less energy (and requires a smaller resistor) than wiring them in parallel. The current in the circuit, I, is found by:
I = (Vin - (Vd * n)) / R
Where Vin is the supply Voltage, Vd is the LED forward Voltage drop, n is the number of LEDs, and R is the resistor value in ohms. So for my circuit I = (18 - (3 * 5))/330 = 0.01515 Amps = 15mA.
Using blue, green, or ultraviolet LEDs would also work with this circuit since these LEDs tend to have forward voltage drops around 3 Volts. Red, amber or yellow LEDs would require a higher-value resistor since they tend to have forward voltage drops around 2.2 Volts. For example, they might require around a 600-ohm resistor to operate at the same current of 15mA: R = (18 - (3 * 2.2))/0.015 = 600 ohms.


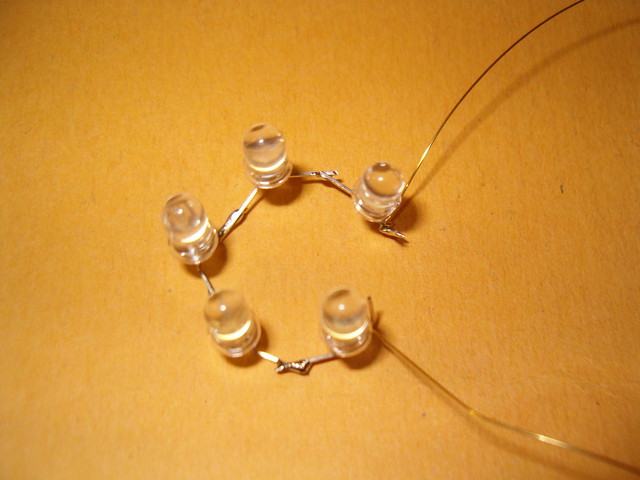
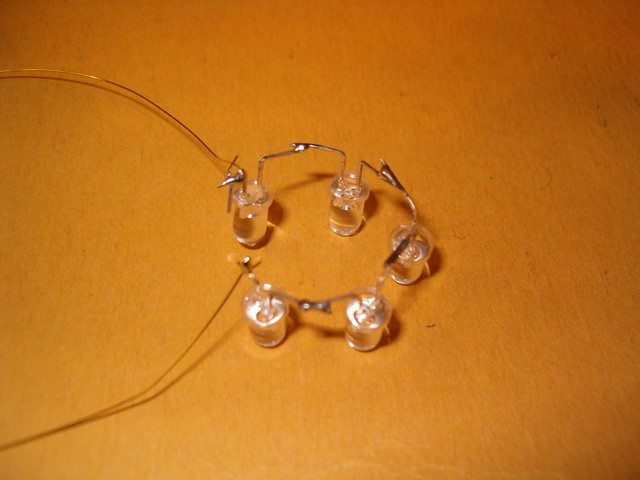
LED circuit schematic and the series string of
LEDs after being soldered together in a circular-shape.
I wired my LEDs as shown in the schematic above by soldering the legs of the LEDs together. Before soldering, I used needle-nose pliers to hold a lead of the LED (near the base) while using my hands to bend the lead in a 90-degree angle. I repeated this process for each lead on all the LEDs. I then arranged the LEDs in a circle, and soldered their leads together, making sure they were all oriented with the same polarity. After trimming the excess leads from the LEDs, I soldered short pieces of brass wire to the "free" leads of the first and last LED in the series string. This wire will be used to connect the LEDs to the power supply.
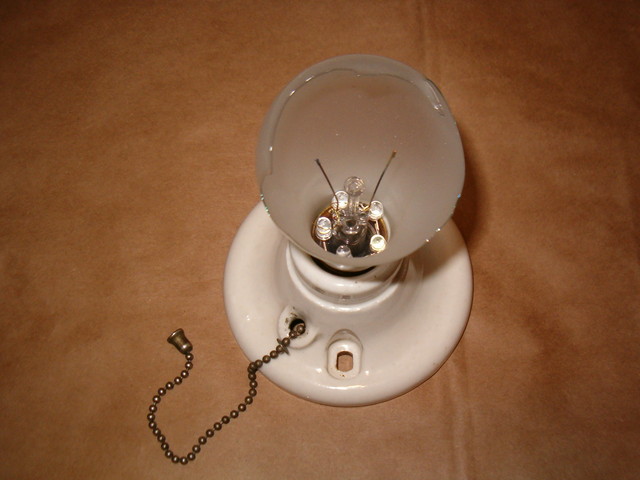
Step 5: Connecting the LEDs to the light bulb
The last step was to connect the series string of LEDs to the light bulb, and place them inside. The light bulb will have two steel wires sticking outward from the center from its base (possibly surrounded by a glass stem "support". One of these wires connects to the bottom contact of the light bulb's screw base, and the other connects to threaded part of the screw-base.
The goal is to connect the two wires coming from the LEDs to the two wires inside the light bulb, respectively. I found that the brass wire jumpers I used worked well because they were "springy". Thus, after dropping the string of LEDs down inside the glass light bulb, I was able to bend the brass jumper wires around the light bulb's wires with needle-nose pliers. The "springy-ness" of the brass wire then created a good mechanical connection pushing against the light bulb's wires.


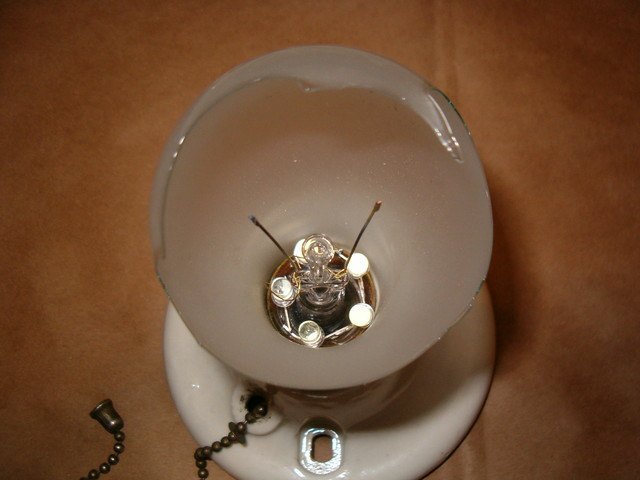
The LEDs placed inside of the light bulb, with brass jumper
wires connecting them to the light bulb's inner wire leads.
Lastly, I connected the power supply (an 18-volt "wall wart" AC to DC transformer) to the light bulb. I did this through a porcelain lamp holder, not only because it makes it easy to connect, but also because it gives the LED light bulb lamp a base and a finished look. The last benefit of my porcelain lamp holder is that it has a pull chain switch already built in!
The process of connecting the power supply consisted of connecting one wire to one screw post on the underside of the lamp holder. The other wire was soldered to one end of the resistor, and the other end of the resistor was then connected to the remaining screw post on the lamp holder. Note that because it is not obvious which lamp holder contact goes to which wire inside the lamp, you may have to swap the power supply wire connections at the lamp holder to get the correct polarity (otherwise the LEDs won't light!)


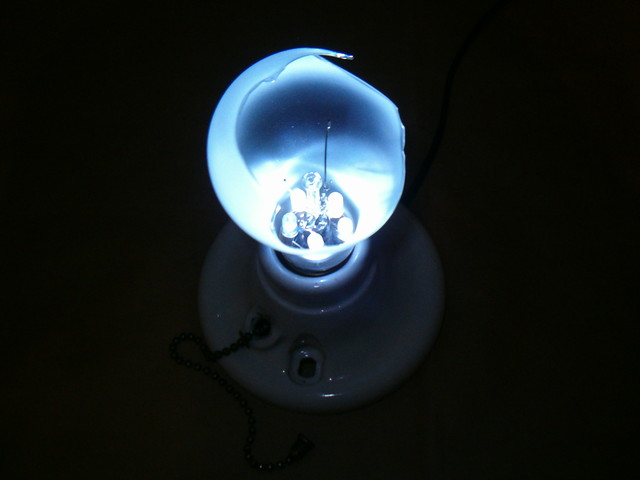
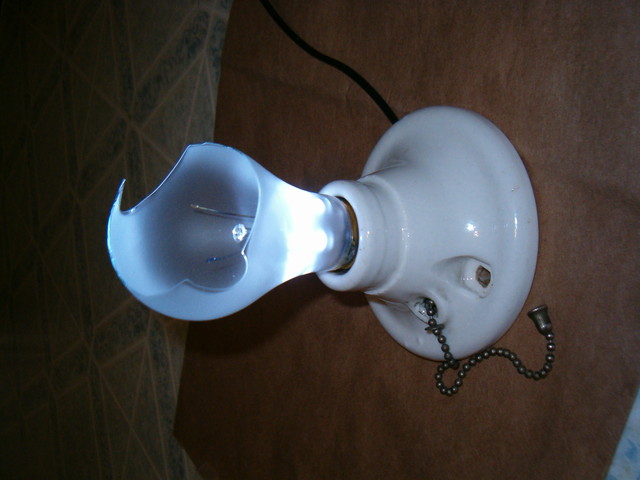
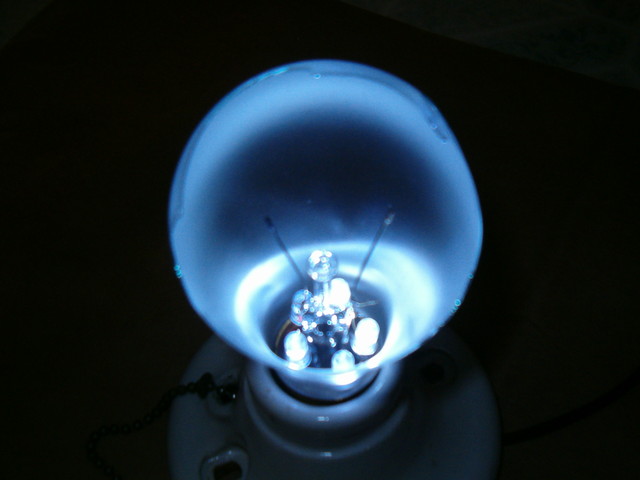
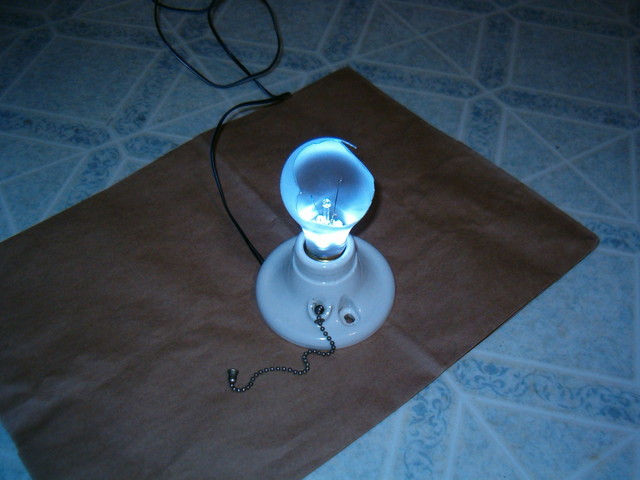
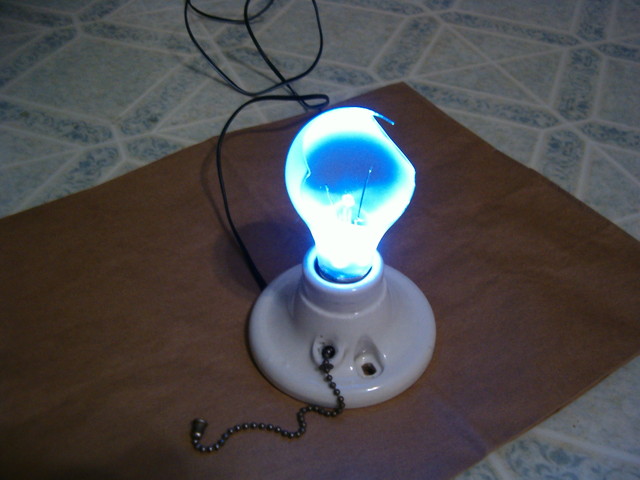
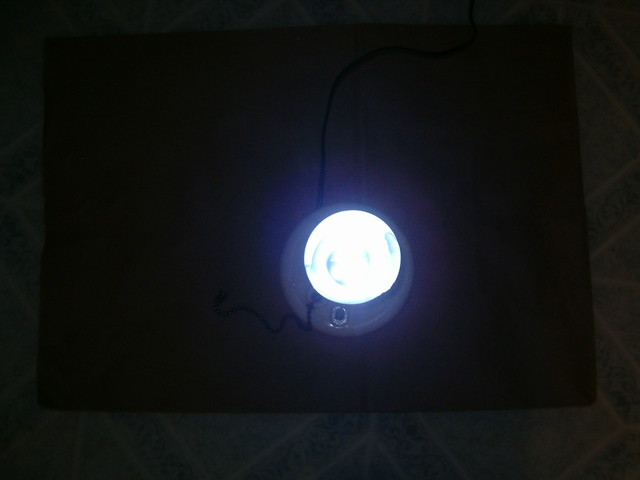
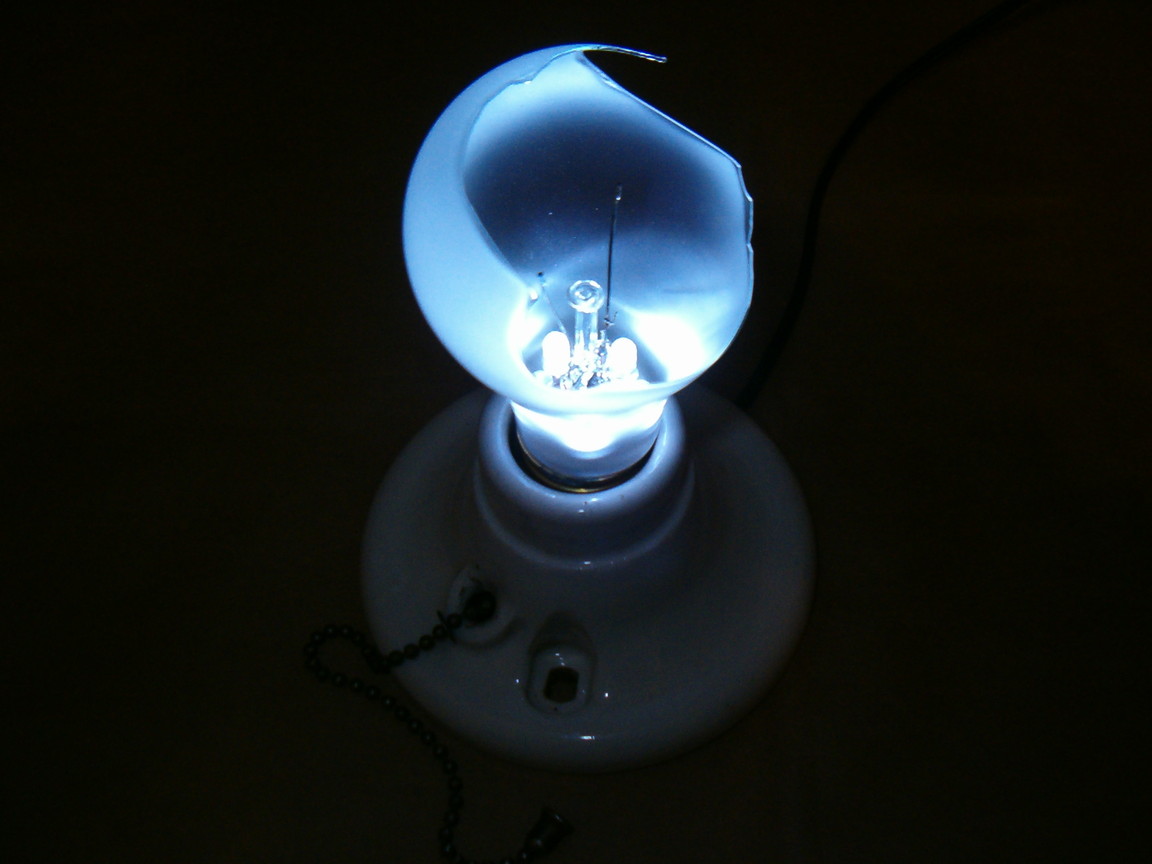
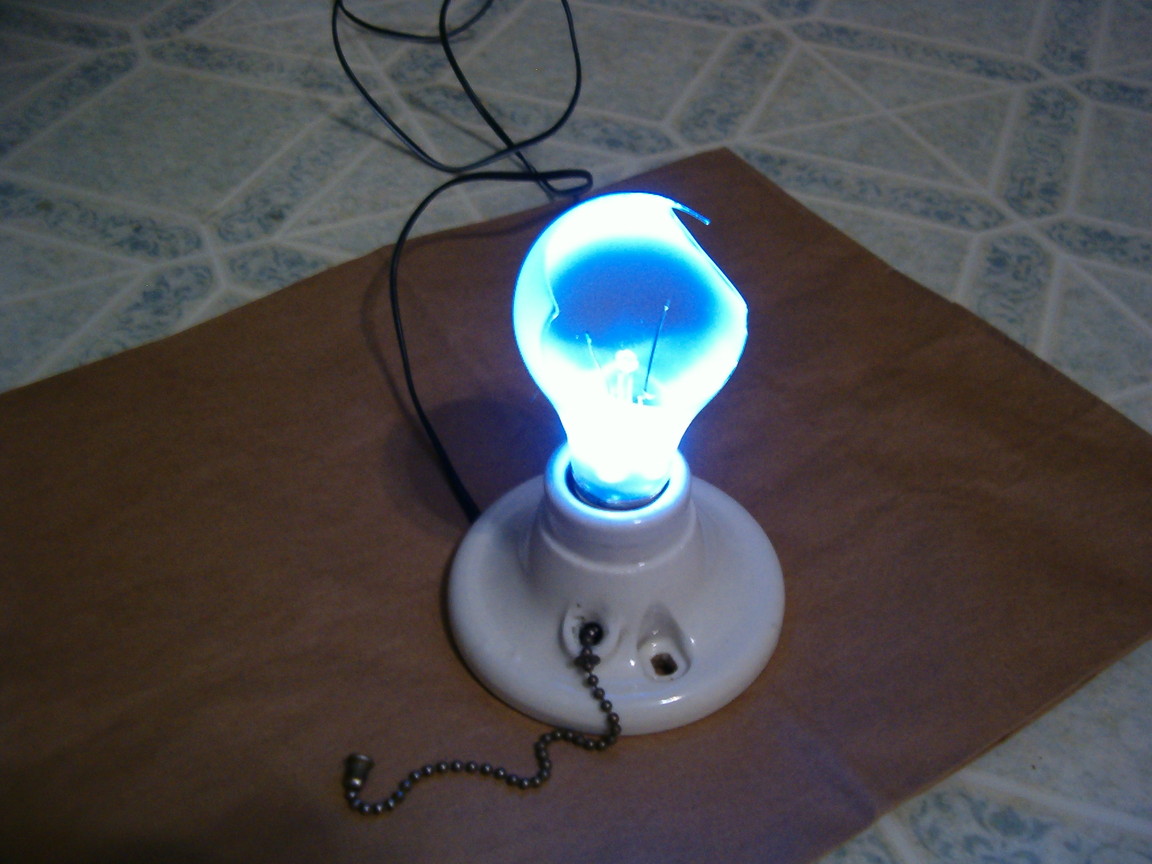
The power supply and resistor are connected to the lamp
holder and the lamp is tested, looking really bad-ass!
Well, that's how you turn an old incandescent lamp into something (arguably) useful, creative, and, dare I say, very artistic. What's even better is the fact that you've prevented a reuseable item from ending up in a land-fill. Oh, and knowing that you've earned some nerd-cred!
|
Broken Light Bulb Lamp (version 1) Photos |
|||
 Large || XL |
 Large || XL |
 Large || XL |
 Large || XL |
 Large || XL |
 Large || XL |
 Large || XL |
 Large || XL |
 Large || XL |
 Large || XL |
 Large || XL |
 Large || XL |
 Large || XL |
 Large || XL |
 Large || XL |
 Large || XL |
 Large || XL |
 Large || XL |
 Large || XL |
 Large || XL |
 Large || XL |
 Large || XL |
||
